Search & Browse
To find and explore reference entities, you can use the Search . Start typing one or more search terms in the search bar.
Tips for Effective Searching:
- Wildcards: Use asterisks '*' or '?' wildcards.
- '*' represents zero or more characters in a string of characters.
- '?' represents any one character.
- Exact Matches: Use quotes "..." to search for exact matches
- By default, searches are fuzzy, meaning they will match similar terms. Use quotes to find exact matches.
Result View
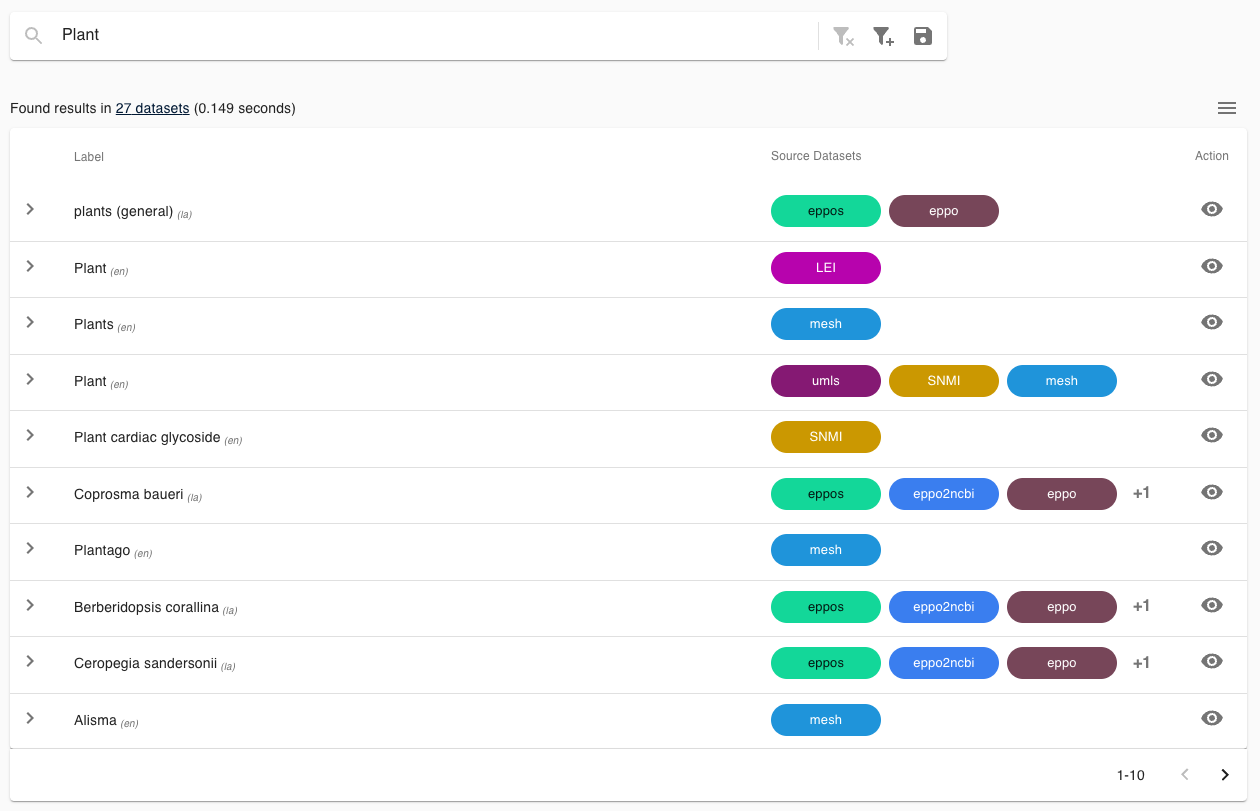
Accurids performs an instant search with each character you type. Search results are displayed by their preferred label in descending order of relevance. The dataset badge indicates the matching dataset. The number of results is displayed at the top of the table, along with the number of datasets where the search item appears.
Interacting with Search Results
- Hover over a search result row and click on it to open the Preview for the metadata of the corresponding entity. In the preview, you can:
- Add Column: Hover over properties in the preview and click Add column "..." to the table to add it as a new column.
- Quick Actions: Hover over values in the preview to access quick actions:
- Include Matches: Include items that match the value.
- Exclude Matches: Exclude items that match the value.
- Copy Label: Copy the label of the value.
- Copy URI: Copy the URI (for resources).
- Entity View: Click the eye icon to open the entity view (for resources).
- Click to access the Entity Details view where all related information is displayed.
Interacting with Columns
- Drag and Drop: Users can drag and drop columns to rearrange them.
- Column Options: Hover over a column header to reveal the Column options menu. Click on it to display the following options: sort the results in ascending/descending order, filter columns, copy URIS, remove columns, move columns to the right or left.
- Right-Click Menu: In the column space, right-click to access the same menu as when clicking Column options.
- Search in Column: Hover over the column and click the Search in column icon to type the value directly instead of configuring filters through facet filters.
Filter
Filters can be applied to restrict the search to specific datasets or based on specific metadata. Enter the filter dialog by clicking the "Add new filter" icon . To invert the filter, hover over the applied filter badge and select Exclude matches.
Filter by Dataset
To restrict the search to a specific dataset, select DATASETS and choose a dataset from the dropdown menu.
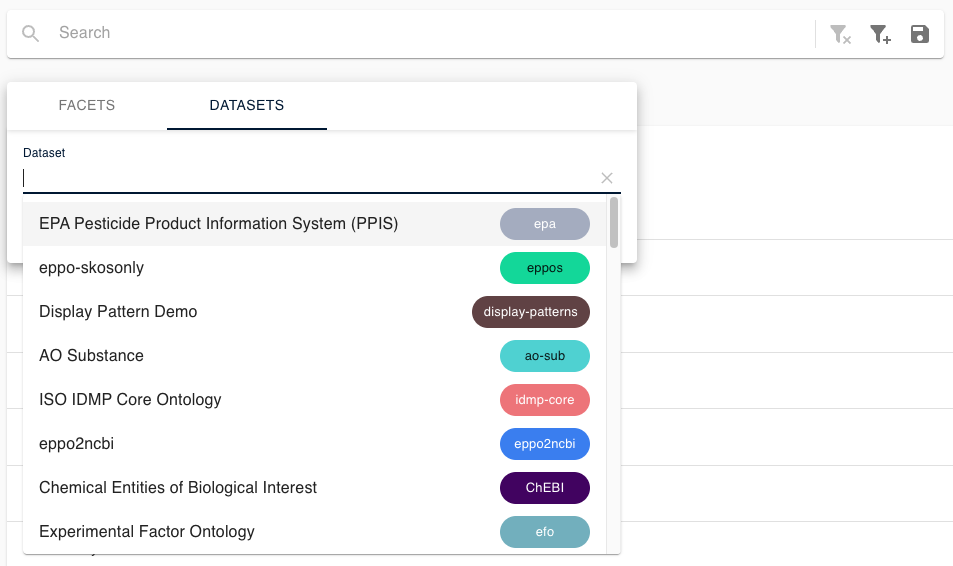

You can also add dataset filters by clicking on any colored dataset badges.
Filter by Facet
You can filter the search for the presence or absence of specific metadata statements. To do that, select FACETS and select a predicate in the Filter field. Click the Value field to select from all available values for the chosen predicate. A click on APPLY activates the filter.
Four operators can be used to filter the results.
- IS to filter if chosen predicate exists with the chosen value
- IS NOT to exclude results with the chosen predicate and value
- EXISTS to filter results where the chosen predicate exists, regardless of value
- EXISTS NOT to exclude results where the chosen predicate exists

The additional filter option Include class hierarchy is available for specific predicates. The filter will also include the selected Value subclass hierarchy if this option is selected. This can be useful if you want to consider a specific subtree in your search.

Filter Proposal
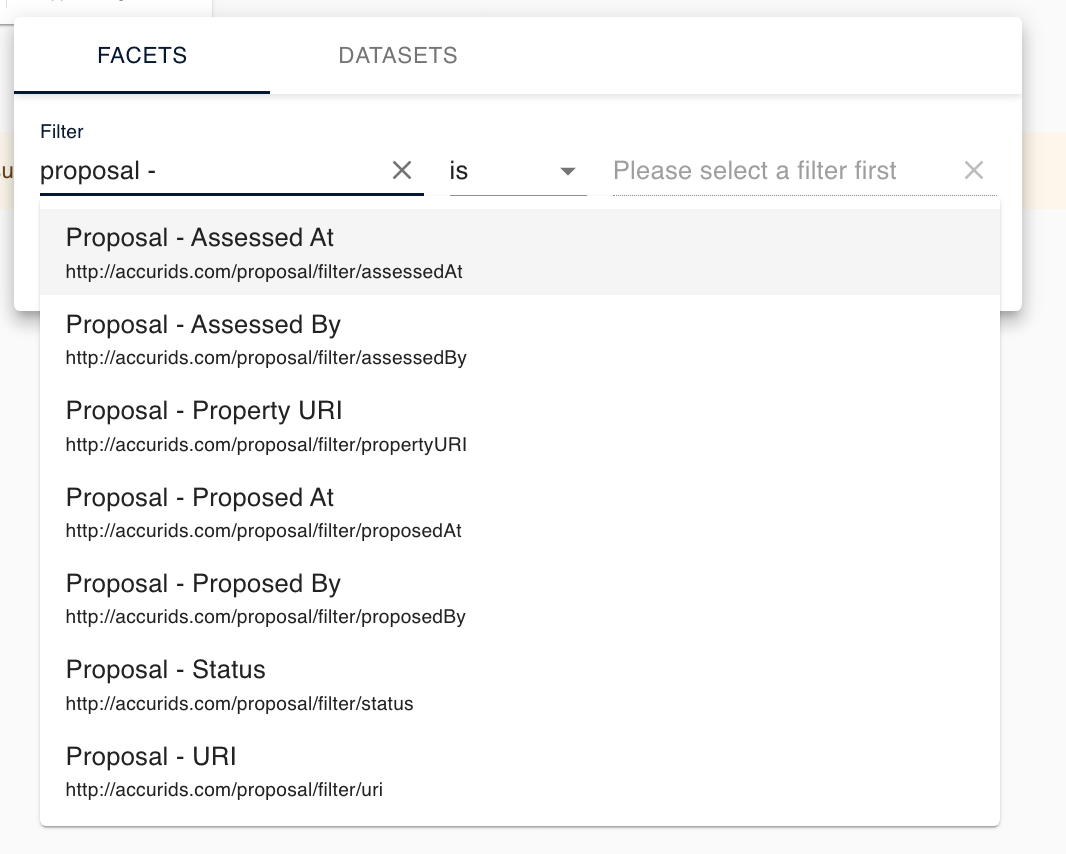
You can filter searches for the presence or absence of a proposal. There are multiple filter predicates that can be used.
Example:
- Proposal - Property URI is used to filter proposal on specific properties.
- Proposal - Status is used to filter proposals by status. Possible values are:
PENDING,ACCEPTED,REJECTED.
The result for this filter proposal shows all entities that have proposals matching the applied filter.
Saved Searches
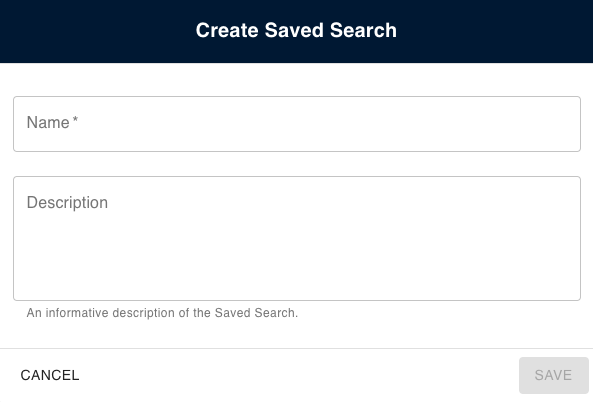
You can save your search, including all applied filters and columns, by clicking on the in the search bar.

Provide a name and a description for your saved search and click on the SAVE button.
Saved search sharing
You can share saved searches by copying and sharing the browser URI. The URI includes the search term, all filters, table columns, and the name and description of the saved search.
Search Result Export
To export the search results, click the burger menu icon in the right corner above the search results table and choose the desired export format.
The available export formats are:
- Export as CSV: Download the search results as a CSV file.
- Export as EXCEL: Download the search results as an Excel file.
- Export as JSON: Download the search results as a JSON file.

Entity Details View
In the search results, click to get to the Entity Details view where all information about an entity is displayed.
By default, the entity is displayed in a global view that aggregates all information related to the entity. One can (de)select datasets as needed and focus on a local view that restricts the display of information to one dataset.
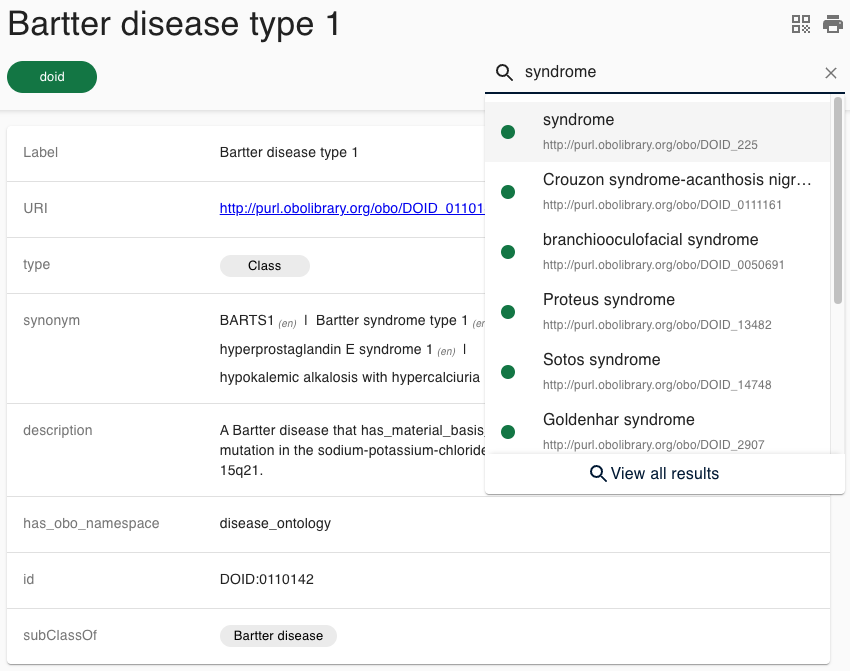
By using the search bar at the top right corner of the Entity Details View, you can search within the currently selected datasets. The colors next to the search results indicate in which datasets the entities were found.
Treeview
Some datasets contain a tree structure. In such cases, the entity details view includes a tree on the left, displaying the entity as part of the hierarchy.
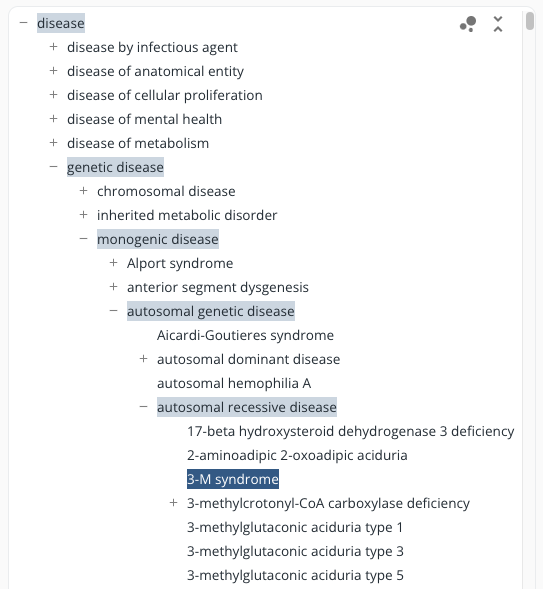
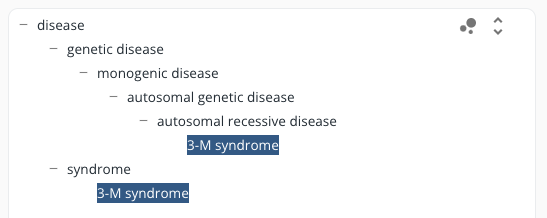
The tree shows the path from the dataset's root element to the selected entity. The parent entities on the path to the root are highlighted. If the entity is present in multiple positions of the hierarchy, the different paths to the root are shown as breadcrumbs on the right, which can be selected for display in the treeview. If the selected entity is not included in the tree hierarchy, it is displayed on top next to the root node.
To browse the tree hierarchy, click on the plus/minus signs. If there is no plus sign, there are no sub-elements.
Minimize / Expand data
By clicking the two arrows next to the scroll bar on top of the tree view, you can minimize the data used in the tree view. This will only show the respective parent entities of the selected entity, allowing for a more compact overview.
Graph visualization
In addition to the treeview, the entity details view also offers a graph visualization for the dataset's hierarchy if the dataset contains a tree structure. This view can be accessed by clicking on next to the 'minimize / expand data' button at the top of the tree view.
The graph is a different representation of the path from the dataset's root element to the selected entity. The selected entity is displayed as a larger, black node, whereas all other entities are represented as smaller, grey nodes. The arrows indicate a connection between entities where the node at the origin of an arrow is the child of the node at the destination of the arrow. As opposed to the tree view, each entity only appears once.
The nodes can be moved around by clicking on a node and dragging it to another place. The mouse wheel allows for zooming in and out. As with the treeview, minimizing / expanding the data only shows the respective parent entities of the selected entity.
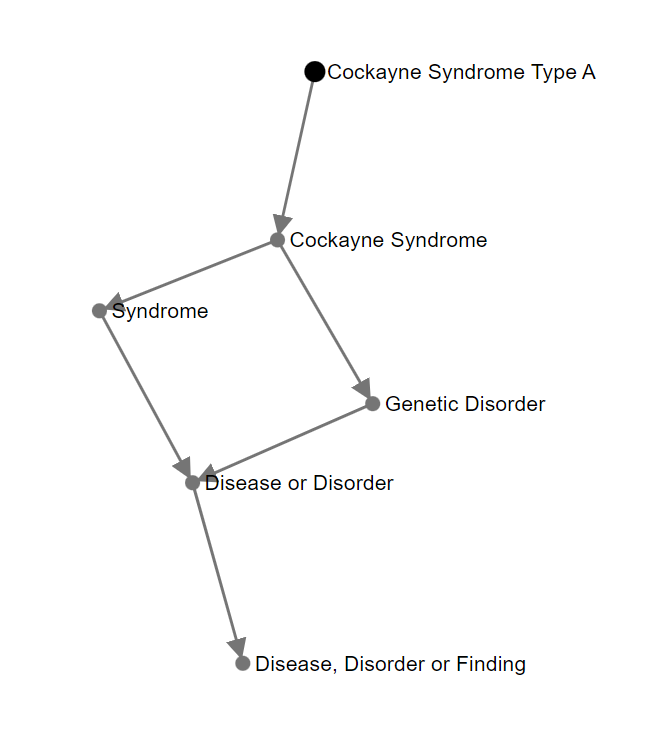
To leave the graph visualization and go back to the treeview, click on .
Audit Trail
Embedded in the Entity Details View, the Audit Trail block provides a comprehensive overview of the lifecycle of your data within the platform. This feature is crucial for ensuring accountability, transparency, and data integrity. It shows detailed information about all significant actions performed on data entities, including:
- Creation: Captures the exact timestamp and the initiator of the data's creation, establishing the origin and initial ownership.
- Modification: Tracks changes made to the data, including what was altered, by whom, and when. This helps monitor data history and manage version control.
- Contributions: Identifies individuals or processes contributing to the data over time, providing a broader view of data interactions.
The Audit Trail helps organizations meet stringent compliance requirements and supports effective data governance strategies. The audit trail properties are configurable, allowing administrators to tailor the level of detail captured based on organizational needs and regulatory obligations.
Please refer to the Audit Trail Properties section in the Platform Administration documentation for instructions on configuring these properties to best suit your organization's requirements.

Mappings View
If available, incoming and outgoing mappings are shown at the bottom of the Entity Details view. Outgoing mappings go from the currently selected entity to others, while incoming mappings are references from other entities. For more information, see Mappings.

Links to Entity
Links to a Reference Entity show other Reference Entities from datasets that contain a currently opened entity and are linked by a specific property.
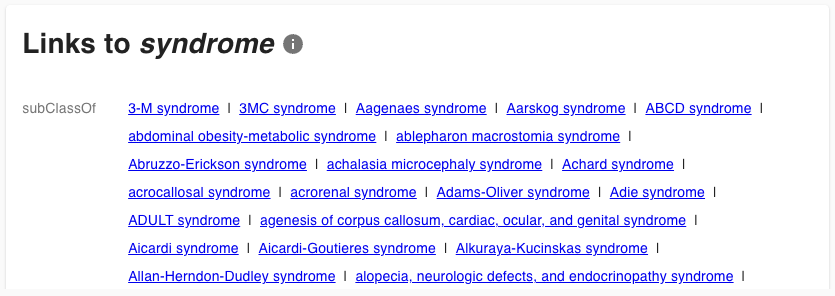
Looking at the example, multiple entities, including the mucosal melanoma entity from the Human Disease Ontology (DOID), contain a Reference Entity for the disease 'melanoma' linked by the 'subClassOf' property, respectively.
